As a developer, you can use Google Tag Manager to implement and manage measurement tags and pixels in your mobile applications, without having to rebuild and resubmit application binaries to app marketplaces. Developers who work with the Google Analytics for Firebase SDK can easily add Tag Manager to help manage and make changes to the implementation, even after the app has shipped.
Developers can log important events and decide later which tags or pixels should be fired.
Prerequisites
Before getting started:
- In the Firebase console, add your app to your Firebase project.
- Set up Google Analytics for your app, including enabling Google Analytics in your Firebase project and adding the Google Analytics for Firebase SDK to your app.
- Create a Tag Manager account.
- Configure a Google Tag Manager container.
The following sections walk you through the steps to configure and use Google Tag Manager in your Android application.
1. Add Google Tag Manager to your project
In your module Gradle file (usually
app/build.gradle), add the following dependency on the Tag Manager library:dependencies { // ... compile 'com.google.android.gms:play-services-tagmanager:18.0.4' }Sign in to your Tag Manager account.
Select a mobile container.
Click Versions in the top navigation bar.
Click the container version you wish to use.
Click Download.
Create the
app/src/main/assets/containersfolder if it doesn't exist. Copy the downloaded container to the folder.
2. Log events and variables
Tag Manager uses events, parameters, and user properties logged by the Google Analytics for Firebase SDK to trigger and build tags you've configured in Google Tag Manager.
Read the Firebase developer documentation for instructions on how to log events and set user properties.
Configure variables in Tag Manager
To capture the value of event parameters and user properties for use in Google Tag Manager, you can configure variables in the Tag Manager interface.
For example, you could log the following custom event in your app:
Bundle params = new Bundle();
params.putString("image_name", name);
params.putString("full_text", text);
mFirebaseAnalytics.logEvent("share_image", params);
Then, you could configure new Event Parameter variables in Tag Manager as
follows to capture the image_name and full_text parameter values:
- Variable Name: Image Name
- Variable Type: Event Parameter
- Event Parameter Key Name:
image_name
and:
- Variable Name: Full Text
- Variable Type: Event Parameter
- Event Parameter Key Name:
full_text
Similarly, you could set the following user property in your app:
mFirebaseAnalytics.setUserProperty("favorite_food", mFavoriteFood);
Then, you could configure a new Firebase User Property variable in Google Tag
Manager to capture the favorite_food value:
- Variable Name: Favorite Food
- Variable Type: Firebase User Property
- Event Parameter Key Name:
favorite_food
Modify and block events
Tag Manager enables you to modify and block events before they are logged by the Google Analytics for Firebase SDK. Modifying events can help you add, remove, or change the values of event parameters or adjust event names without app updates. Events that are not blocked will be logged by the Google Analytics for Firebase SDK.
The Google Analytics for Firebase SDK also automatically logs some events and user properties. You can use automatically collected events and properties in Tag Manager without needing to add any code. However, you can't block them.
3. Send events
Firebase event name variables, Firebase event parameter variables, and other variables are used to set up triggers. Trigger conditions are evaluated whenever you log a Firebase event. By default, Google Analytics for Firebase events automatically fire. It is possible to add a Google Analytics for Firebase tag in Tag Manager to block events from being sent to Google Analytics.
4. Preview, debug, and publish your container
Before publishing a version of your container, you'll want to preview it to make sure it works as intended. Google Tag Manager gives you the ability to preview versions of your container by generating links and QR codes in the web interface and using them to open your application. You can also enable a verbose logging mode to debug any unexpected behavior.
Preview container
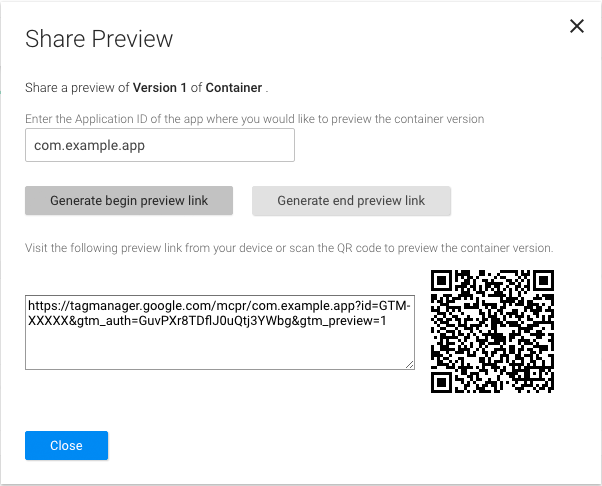
Before previewing a container, generate a preview URL in the Google Tag Manager web interface by selecting the version of the container you'd like to preview, and then selecting Preview. Save this preview URL for later steps.
To preview your container (if you use Android Studio, skip to step 3):
Add this preview activity to your
AndroidManifestfile:<!-- Add preview activity. --> <activity android:name="com.google.android.gms.tagmanager.TagManagerPreviewActivity" android:noHistory="true"> <!-- optional, removes previewActivity from activity stack. --> <intent-filter> <data android:scheme="tagmanager.c.com.example.app" /> <action android:name="android.intent.action.VIEW" /> <category android:name="android.intent.category.DEFAULT" /> <category android:name="android.intent.category.BROWSABLE"/> </intent-filter> </activity>Change this line to include your application's package name:
<data android:scheme="tagmanager.c.com.example.app"/>In the Google Tag Manager web interface, generate a preview link:
- Sign in to your Tag Manager account.
- Select a mobile container.
- Click Versions in the top navigation bar.
- Click Actions > Preview on the container version you'd like to preview.
- Enter your application's package name.
- Click Generate begin preview link.
Stop your application and use the generated preview link or QR Code to launch your application.
You can exit the preview mode by clicking a link generated by the Generate end preview link option in the web interface.
Debug container
To troubleshoot your container implementation, enable verbose logging:
$ adb shell setprop log.tag.GoogleTagManager VERBOSE
Publish container
After you preview your container and verify that it is working, you can publish it. After you have published your container, your tag configurations will become available to mobile app users.
Next steps
Read Advanced configuration.